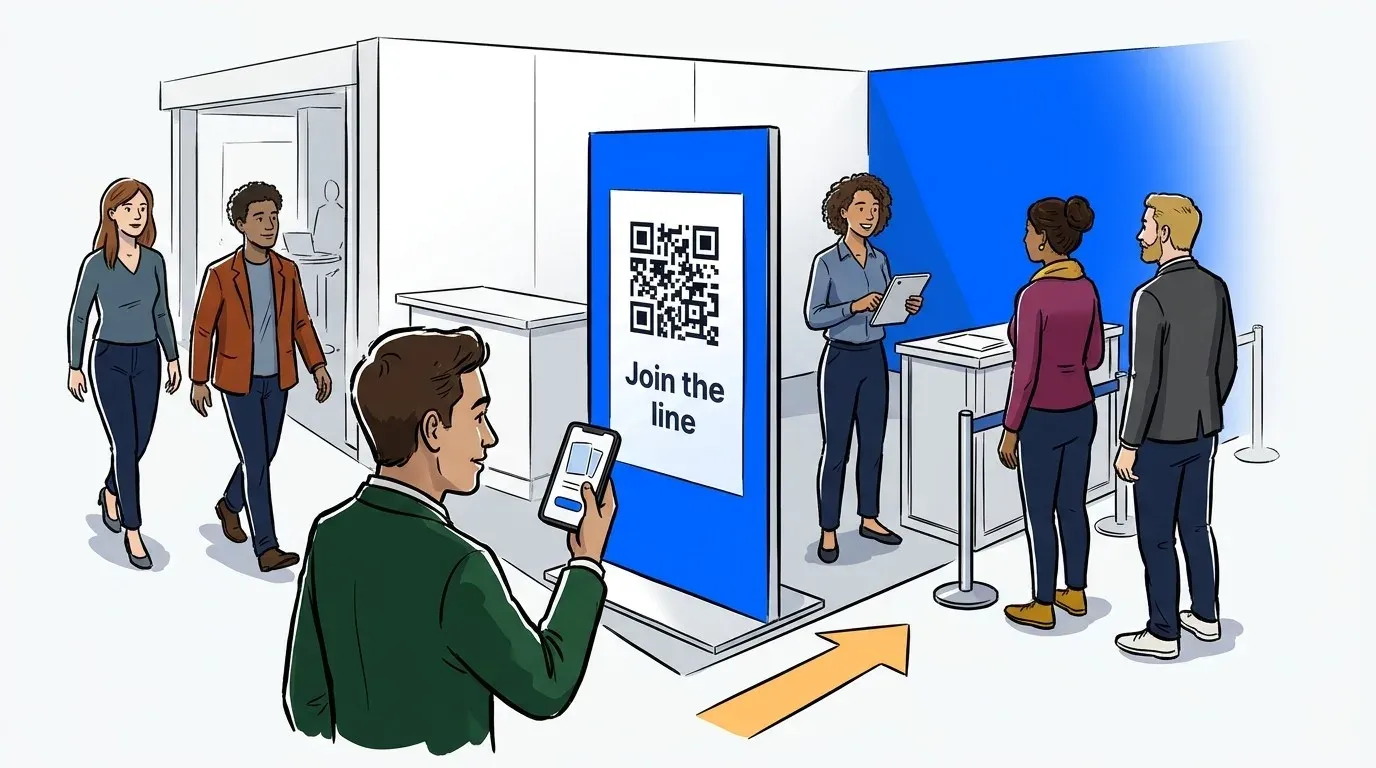
Every virtual queue starts with a sign. It’s the first thing guests see, and it’s often the last thing teams think about.
A confusing sign sends guests to the crowd instead of the queue. A clear one gets most guests in line without asking anyone for help.
The good news is that signs are cheap and quick to fix. Here’s what each sign should say, where they go, and common mistakes to avoid.
What event queue signage needs to do
Event queue signage is the set of printed signs that tell guests how to join a virtual queue, where to wait and where to come back when called. Good signs answer three questions so your staff don’t have to: how do I join, can I leave, and where do I go when it’s my turn? Each sign does one of those jobs.
Most activations need four signs. Small ones can get by with two.
- The join sign. The QR code and a short headline that says what it does.
- Signs on the way in. Smaller copies of the join sign, placed where people first see your booth.
- The return sign. At the front of your line, telling called guests where to line up.
- A status sign. Optional. It says the line is full for the day, or when it opens.
We’ve written about why the join code belongs where people first see your booth, and how to call guests back in waves.

What each sign should say
Guests read signs in a busy aisle, often while walking. Keep every sign short.
The join sign
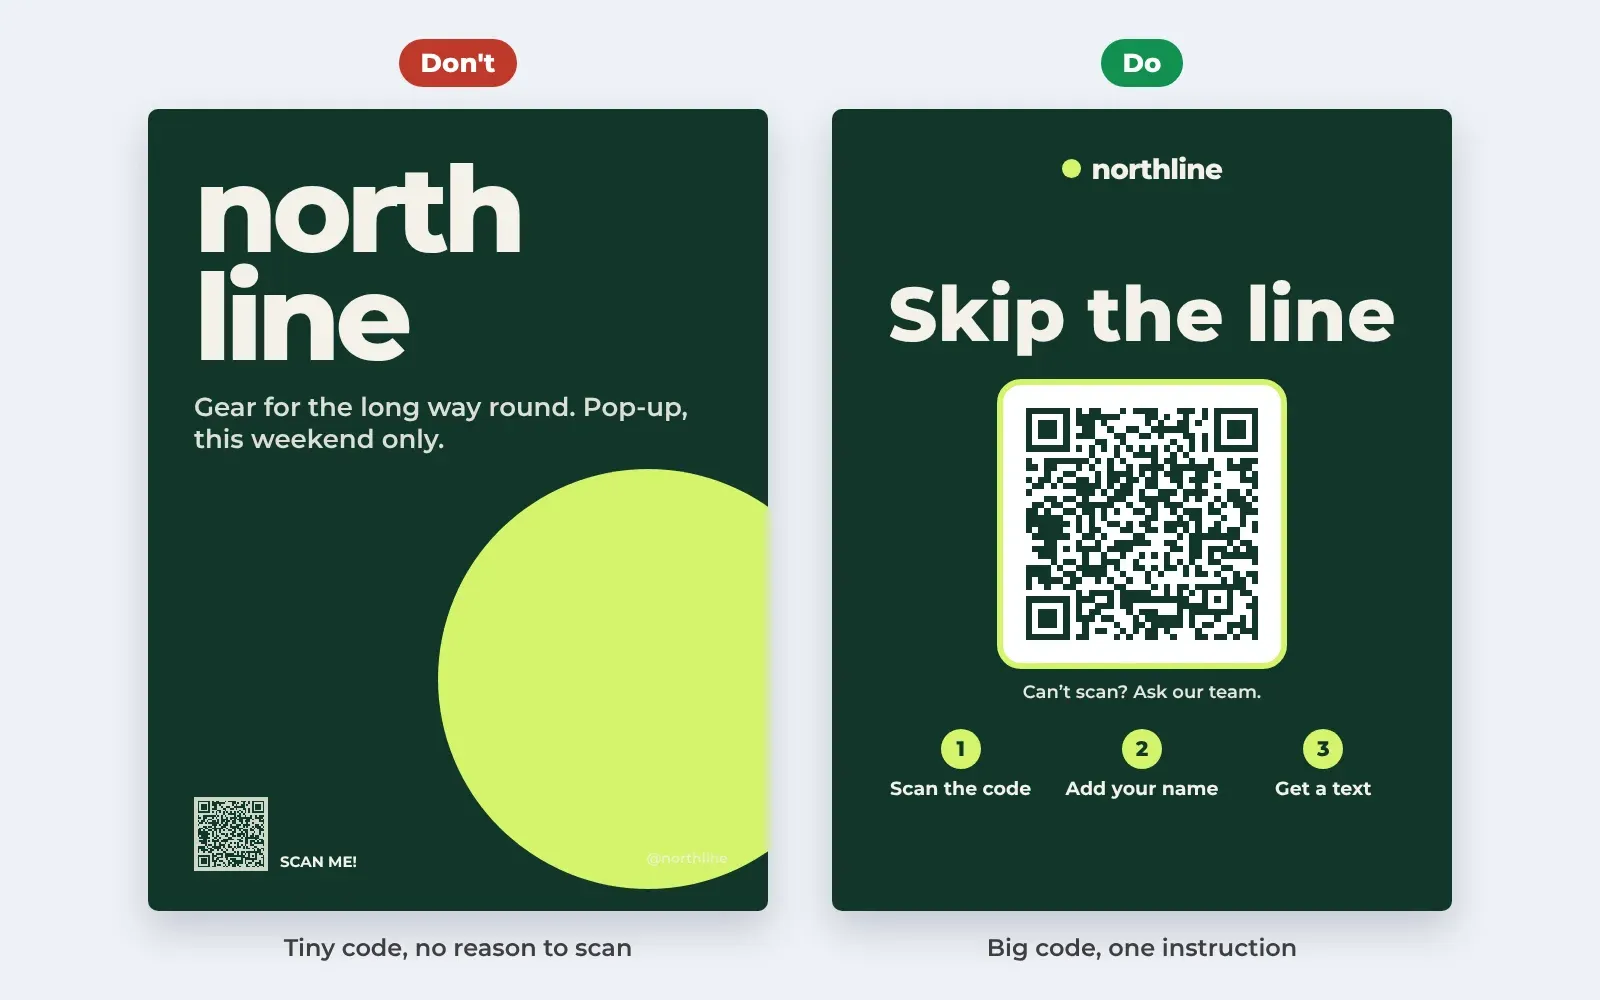
The join sign needs a headline that says what the guest gets and a large QR code. Keep everything else short. “Skip the line” or “Join the line from your phone” both work. “Scan me” doesn’t, because it gives no reason to scan.
If you have room, you can add short numbered steps under the code: scan the code, add your name, get a text. They help but aren’t required. Either way, add a line for guests who can’t scan, such as “Can’t scan? Ask our team.” If the line opens at a set time, print that time on the sign.
Our free QR Code Sign Generator makes a sign like this from your queue link in a few minutes, with no sign-up.
Signs on the way in
These are smaller copies of the join sign. They catch guests before they reach your booth. A guest who joins 30 feet away never adds to the crowd at the front.
The return sign
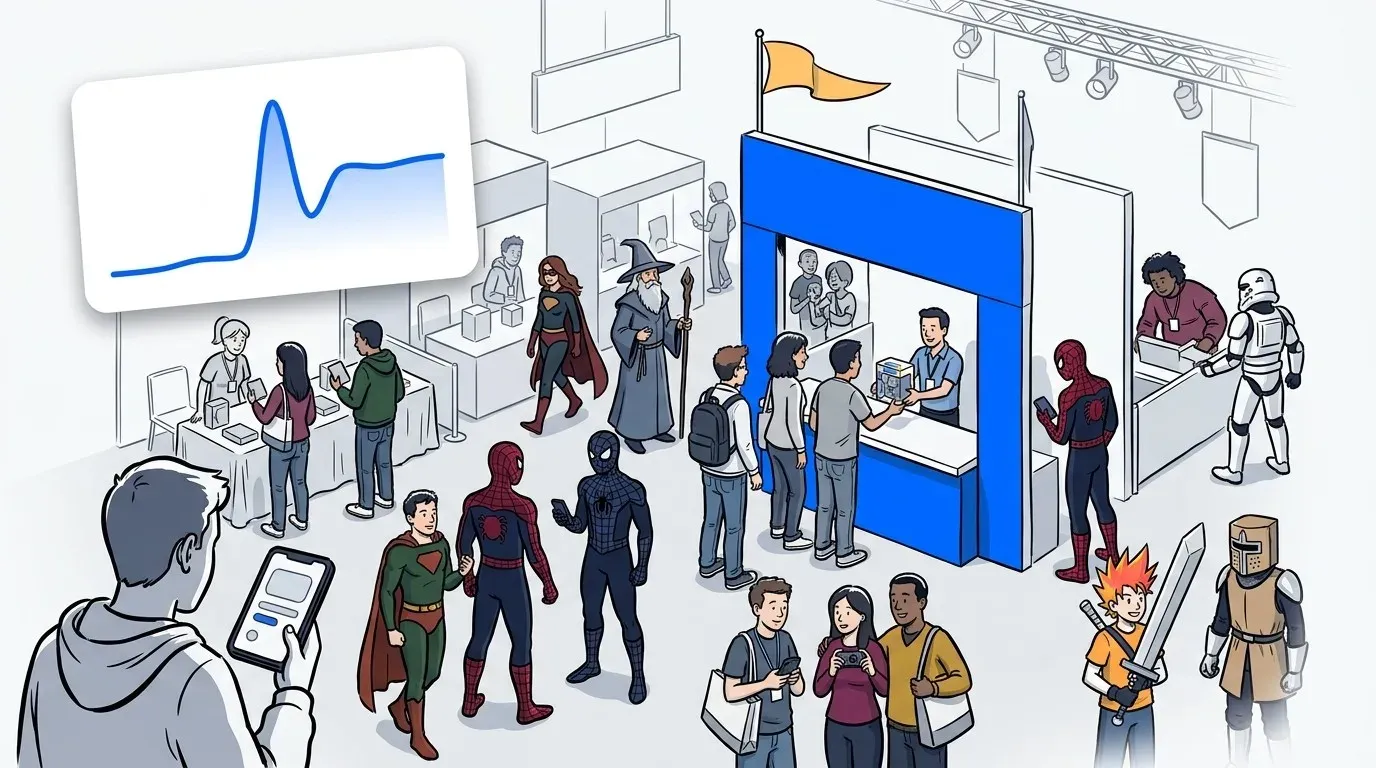
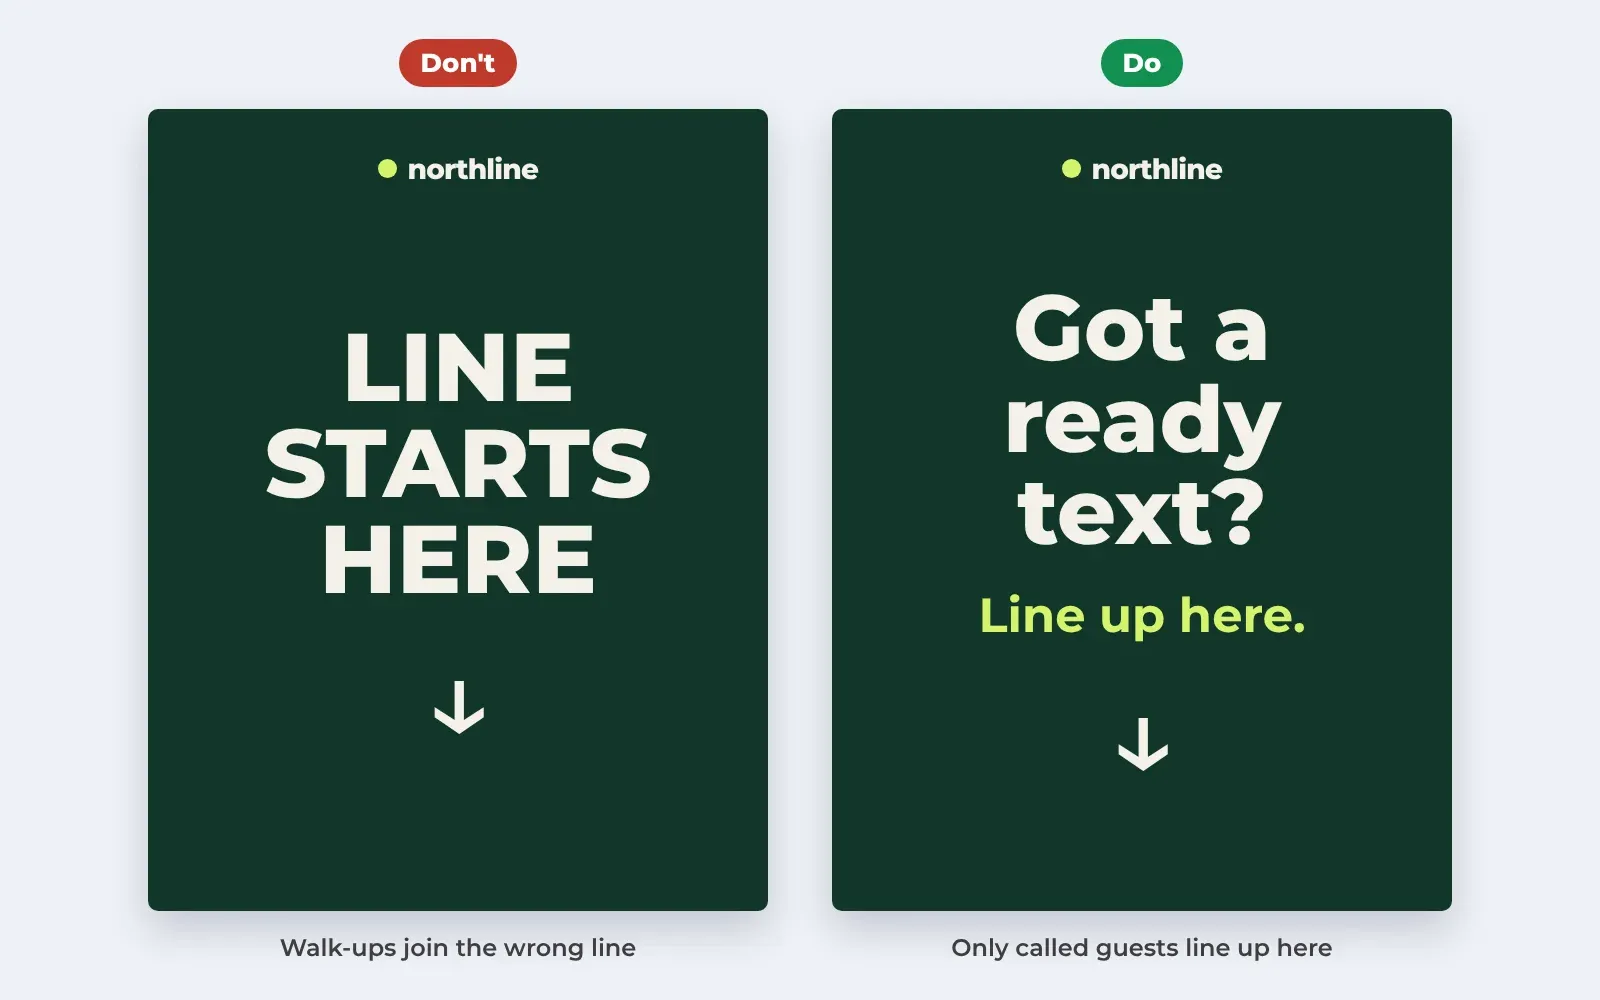
The return sign is the one most teams forget. Guests who get a text come back from all over the floor. They need to know exactly where to stand, and walk-ups need to know that line isn’t for them. “Got a ready text? Line up here” does both jobs. CatFace ran its New York Comic Con booth this way. Only fans with a text could enter its on-deck area, which held about 20 people. The booth served over 2,100 fans across three days. Here’s how CatFace ran it.
The status sign
If you might run out of capacity, a status sign saves your staff from repeating the news all afternoon. “Today’s line is full. Join tomorrow’s line from 10 AM” is honest and gives guests something to do next. Keep a blank version ready to fill in on the day.
Common sign mistakes, and how to fix them
Most bad signs fail for the same few reasons. Each one is easy to fix.
There’s only one sign
This is the big one. With high demand, a single sign is a recipe for a crowd control problem. Everyone heads to the one spot where the code is, and you get the crowd you were trying to avoid. Guests who have already joined can’t get back out. All those phones also share one crowded network, so pages load slowly or not at all.
Put up several copies of the join sign: at the edge of your space, along the walkways leading to your booth, and anywhere people gather nearby. Guests can join from wherever they are, and from somewhere with signal.
The code is too small to scan from where people stand
A QR code scans from roughly 10 times its own width. A code 1 inch wide reads from about 10 inches away, so guests have to crowd around the sign to scan it. A 4-inch code on a letter-size sign reads from 3 to 4 feet. If people need to scan from across an aisle, use an 11 x 17 poster or bigger.
The branding crowds out the instruction
Brand teams usually design event signs, so the signs look like the brand. That’s fine until the logo fills the sign and the code ends up in a corner. Keep the brand, but give the code and the headline the most space.
One sign carries several codes
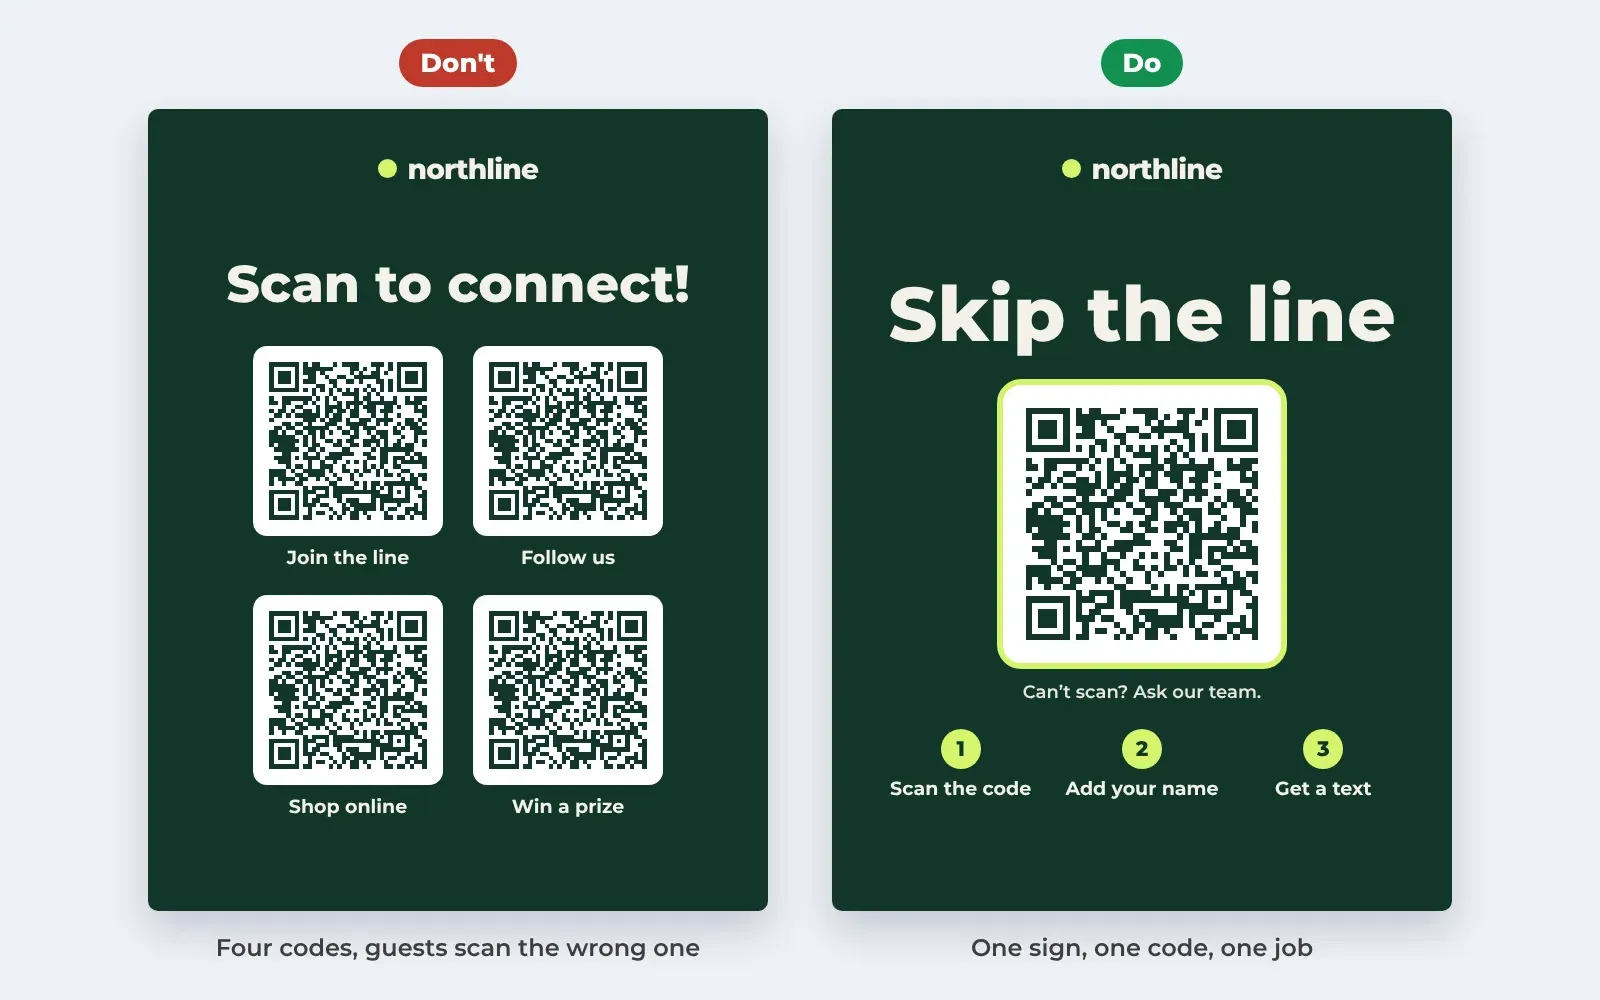
It’s tempting to put every link on one sign: the line, your Instagram, the online store, a giveaway. Guests scan the first code they see, and plenty of them end up on the wrong page. Give the line its own sign with one code.
If you run more than one queue, give each queue its own sign and name the queue in the headline.
The sign tries to say everything
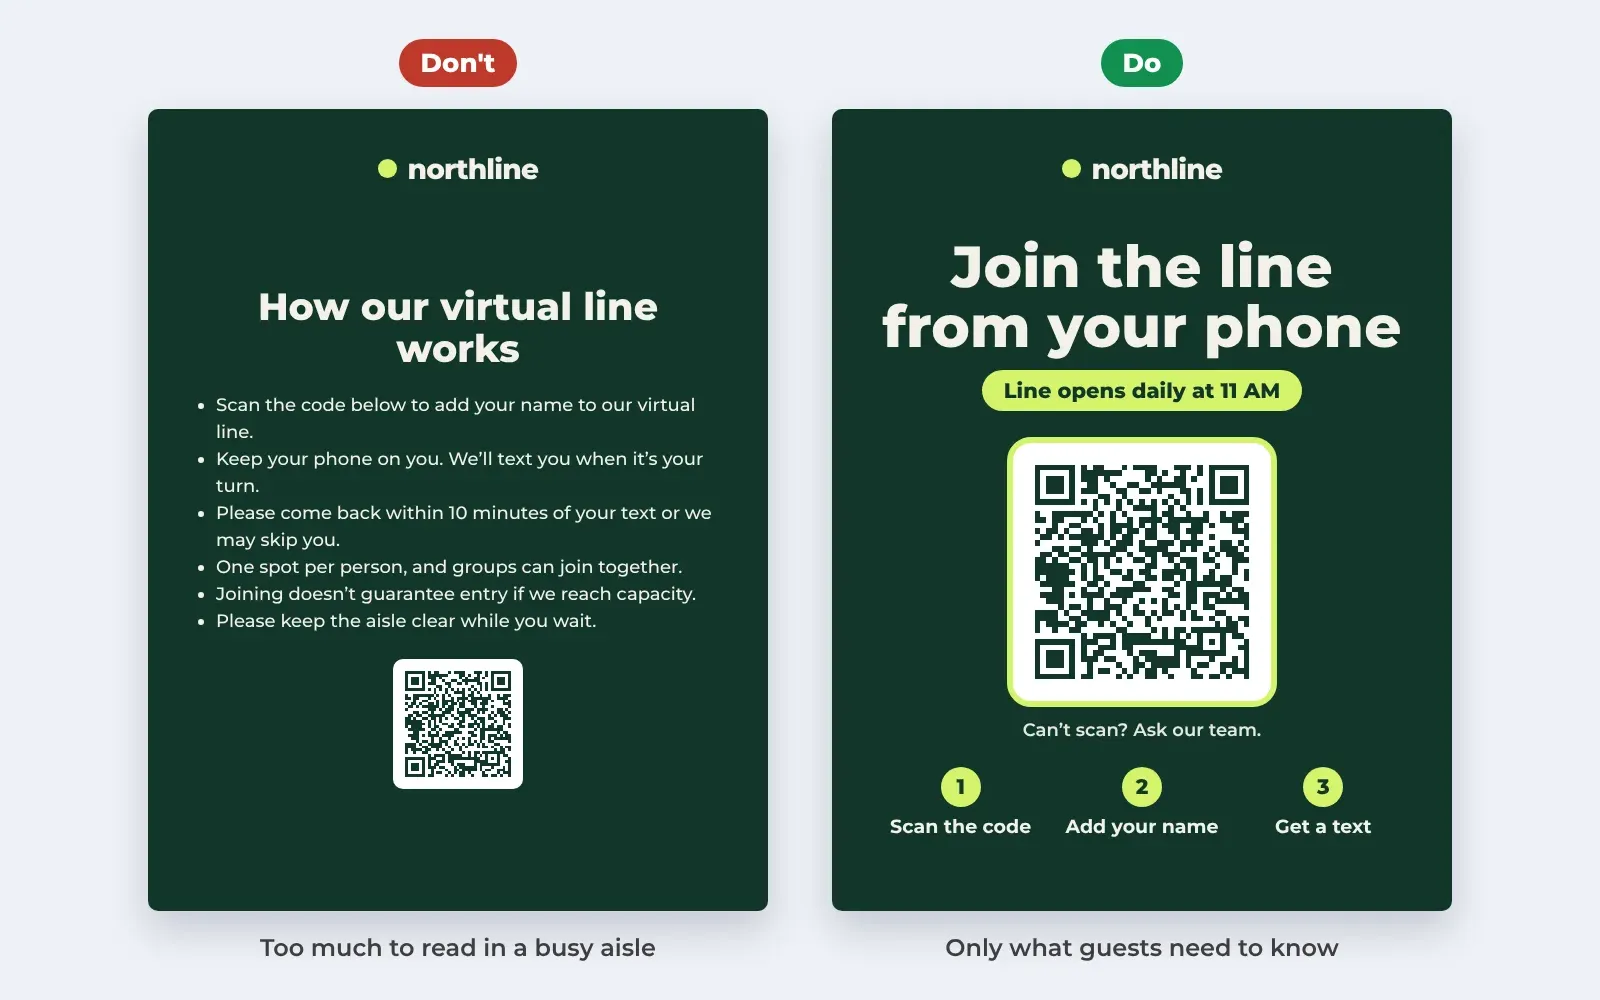
Teams often put everything on one sign: how the line works, when to come back, capacity and house rules. Each point makes sense, but nobody stops in a busy aisle to read six of them. Put one instruction and one time on the sign. Move the rules to the self check-in form or the confirmation text, where guests can read them on their phone.
There’s no fallback for guests who can’t scan
Some guests have a dead phone, a cracked camera or no data. Others would rather not scan at all. If the sign offers no other way in, those guests stand in front of it looking lost. Print “Can’t scan? Ask our team” on the sign, and have staff ready to add guests from a tablet.
There’s no return sign
Without one, called guests wander the front of the booth asking staff where to go. Walk-ups see a short line and join it, assuming it’s the only line. A generic “Line starts here” sign makes this worse, because it invites everyone.
The code is hard to read in the light
Glossy laminate reflects overhead lights and can stop a phone from reading the code. So can a gray code on a pale background. Use a matte finish and a dark code on a light background, with a white border around the code.
Where to put each sign
Placement matters as much as wording. A good sign in the wrong spot does nothing.
- The join sign goes where people decide to wait. That’s usually the corner of your space that faces the main aisle.
- Signs on the way in go at the edge of your space and along nearby walkways. Put them at eye level, in good light, where people can stop without blocking traffic.
- The return sign goes where called guests line up, at the front of your booth. It should be visible from the direction guests walk back.
- The status sign goes next to the join sign, so guests see it before they scan.
When to put signs up depends on the event. Some activations post the code from the moment doors open, so they capture every guest from the start. Others let the space fill first and bring out the code when a line starts to form. Both work. Decide in advance, and make sure whoever runs the line on the day knows the plan.
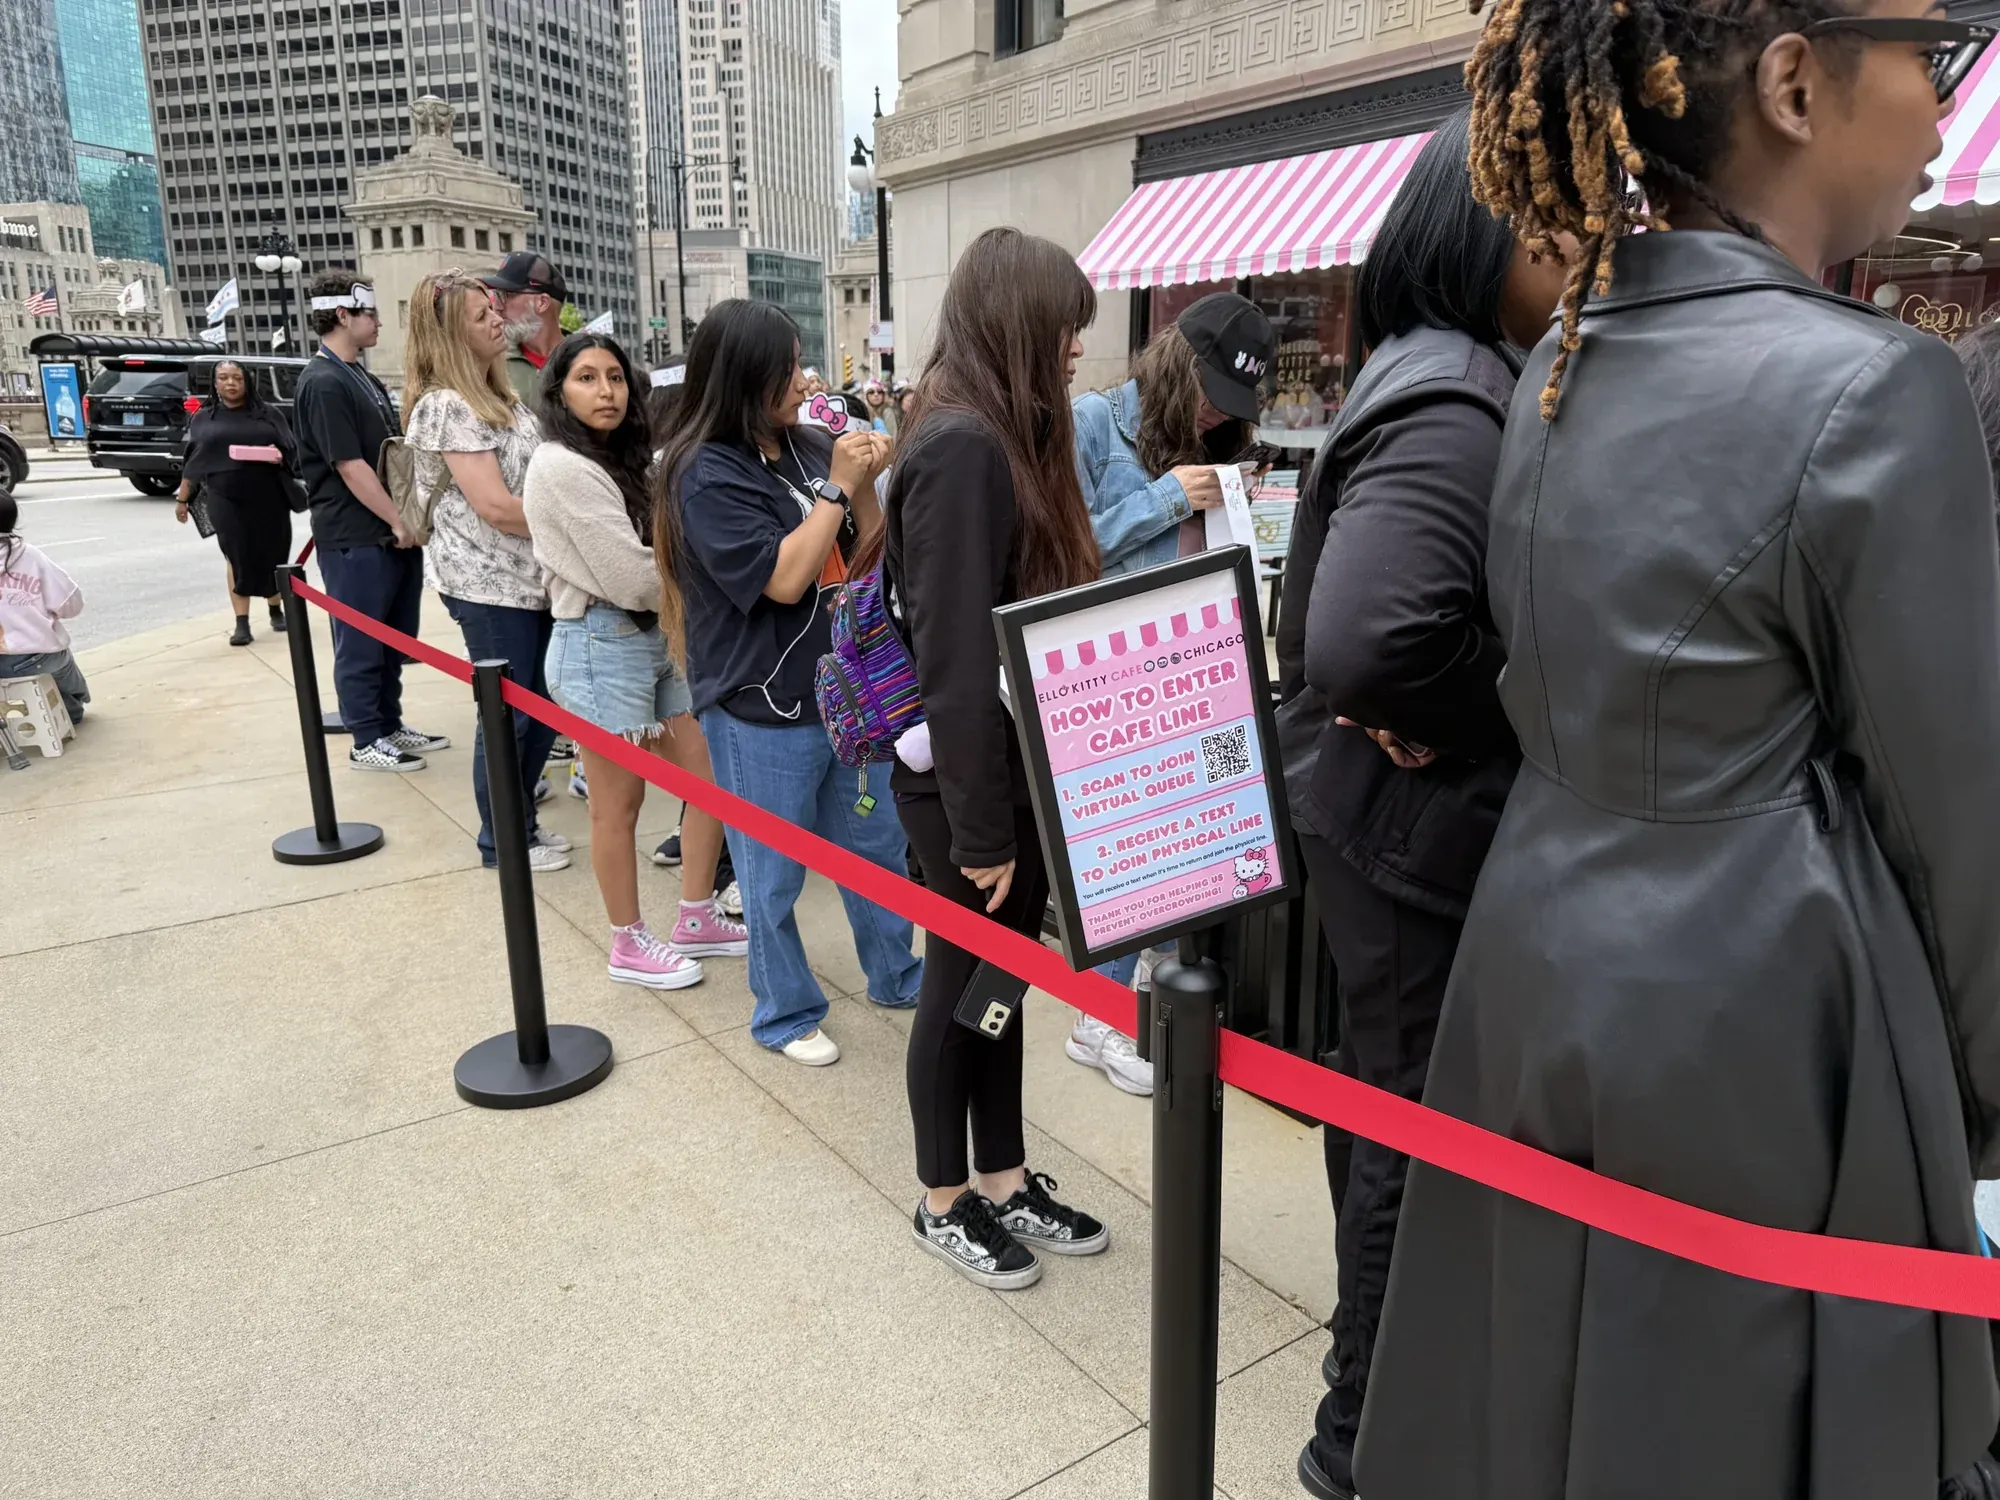
At Hello Kitty Cafe Chicago, the team kept it to two steps on a pink sign by the sidewalk line: scan to join, then return when you get the text. The cafe handled over 4,600 guest visits across its grand opening weekend. The full story’s here.
For a high-demand drop, you’ll need more signs, posted earlier. We’ve written about what goes wrong when one QR code goes up the morning of a launch.
Make the join sign in a few minutes
You don’t need a designer to get the join sign right. Our free QR Code Sign Generator builds a printable sign from your queue link. Pick a size from a 4 x 6 table card to an 11 x 17 poster, add your logo and a header image, then print it or download a PNG. There’s no sign-up.
Before doors open, run a quick check:
- Scan every sign from where a guest will stand, not from arm’s length.
- Scan with your phone connected to cellular, not the event Wi-Fi.
- Read each sign from 10 feet away. Can you tell what to do?
- Check that the return sign is visible from the way guests walk back.
- Check the codes again during the day. Scammers sometimes cover real QR codes with fake ones, so a frame or cover helps.
Need the words for your texts and staff too? We’ve put together ready-made wording for every sign, text and staff answer.
Conclusion
Give the join sign a clear headline, a big code and a way in for guests who can’t scan. Put copies where people first see your booth, not only on the front of it. Add a return sign so called guests know where to go.
Get those right, and your team spends the day running the line instead of explaining it. See how NextMe handles queue management for events, from the first scan to the post-event report.